What is Cloudflare Mesh? Along with a practical setup guide to connect headquarters, branches, and remote employees.
Many companies start from just a single office, but as the business grows, the IT system often spreads out. Some companies have branches in several provinces; some have servers at the headquarters and backup systems on the Cloud, while some employees need to work from home or travel abroad.
When all locations need to share information, the key question is how to connect all systems together securely, stably, and without having to expose the organization's internal servers directly to the Internet.
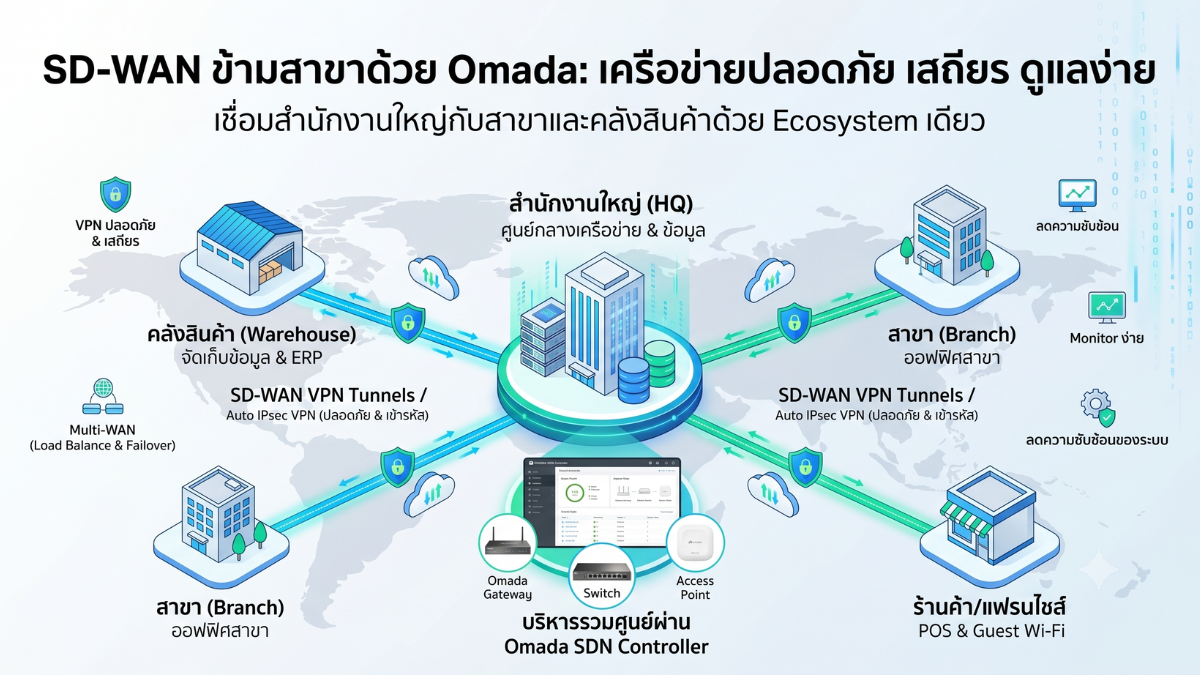
A long-used popular method is a Site-to-Site VPN, by installing a Firewall or Router at each branch and then creating a connection between them. This method still works well, but as the number of branches increases, configuring, managing routes, changing internet service providers, and troubleshooting when the Public IP changes can become quickly complicated.
Cloudflare Mesh is another option that enables headquarters, branches, cloud servers, and employee devices to connect with each other through Cloudflare's network, where each side initiates the connection itself. Therefore, it is not necessary to open ports to receive connections from the internet, and in many cases, a permanent public IP at each branch is also not required.
This article is not written just to report the launch news, but will start from system planning, preparing equipment, creating Mesh Nodes, adding routes for each branch, connecting employees' notebooks, and checking common problems, using easy-to-understand explanations and minimizing unnecessary technical terms.
What Cloudflare Mesh Is in an Easy-to-Understand Way
Imagine that the company has its headquarters in Bangkok, a branch in Chiang Mai, and servers on the Cloud. All three use different Internet providers and have their own internal networks.
If using the same type of VPN, each site may need to know the Public IP of the other side, the encryption keys must be configured to match, the Firewall must be opened, and it must be specified which route will go through which Tunnel. If there are multiple branches, the number of connections and the number of settings to manage will also increase accordingly.
Cloudflare Mesh changes the approach by having each location install a small intermediary device called a Mesh Node. This device connects out to Cloudflare, which then helps send data to the correct destination according to the route we have specified.
Devices that join the Mesh, whether they are nodes or employee machines, will receive a private IP address for use within the Mesh, by default in the range of 100.96.0.0/12. This number is like an internal number used to identify each device through Cloudflare's network.
Communication is not limited to websites but supports general network system usage, such as Ping, SSH, Remote Desktop, File Sharing, accounting programs, databases, and internal APIs, supporting TCP, UDP, and ICMP.
How Cloudflare Mesh is different from Cloudflare Tunnel
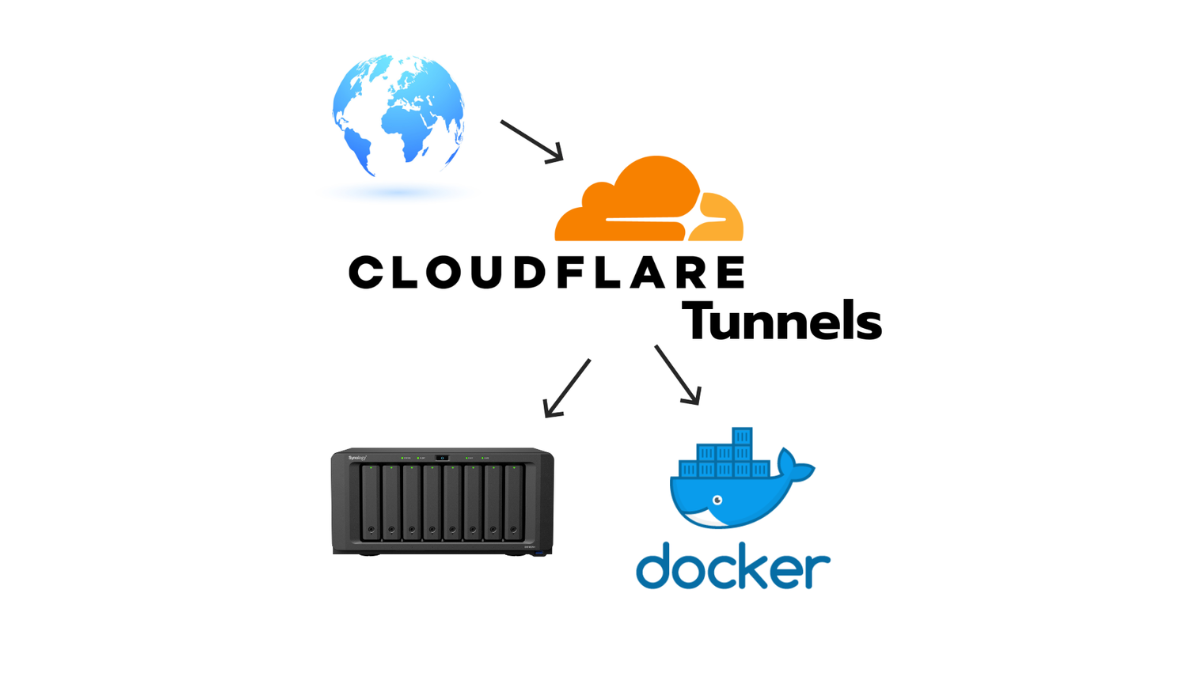
The names of the two services can be confusing because both connect internal organizational systems to Cloudflare, but their main purposes are not the same.
| Topic | Cloudflare Tunnel | Cloudflare Mesh |
|---|---|---|
| Suitable for what type of work | Provide certain services, such as websites or backend systems, for users to access through a domain name | Connect server devices and multiple networks to communicate with each other both ways |
| The program used as a connector | cloudflared | Cloudflare One Client or warp-cli on Linux |
| Usage | Usually called via Hostname or specified service | Called via Mesh IP, Private IP, CIDR Route, or Private Hostname |
| Suitable for Site-to-Site | Can do some types, but not the main purpose | Designed to support two-way connections and direct Site-to-Site |
| Usage from Notebook | Users access Applications published via Cloudflare Access | Notebook joins the Mesh and accesses Nodes or Networks behind the Nodes |
In a real system, both can be used together. For example, using Cloudflare Tunnel to open the task notification system through the web for employees to access with a domain name, and using Cloudflare Mesh for the IT department to connect to servers, NAS, printers, or devices within each branch.
In which situations is Cloudflare Mesh suitable?
The company has many branches and does not have a Public IP
The internet of some branches may be behind CGNAT or the provider does not provide a Public IP. If using a VPN that requires waiting for a connection from the internet, you may need to purchase a Fixed IP. However, the Mesh Node connects outward to Cloudflare, which reduces dependency on a Public IP and does not require port forwarding from the outside to the Node.
There are both servers at the office and servers on the Cloud
An organization may have Active Directory, NAS, or accounting systems at the headquarters, but have a Web Server or backup system on AWS, Azure, Google Cloud, or VPS. A Mesh Node can be installed in each network and a route can be set so that both sides communicate with each other through Private IP.
Employees Working Outside the Office
Employees install the Cloudflare One Client on Windows, macOS, Linux, iOS, or Android and register it with the organization. The device will receive a Mesh IP and can access the resources authorized by the organization.
Need to prepare DR Site
If there is a backup system at a different location, the DR Site can be pre-connected with Mesh. In the event of an incident, you can adjust the Route, DNS, or Application endpoint according to the DR plan without having to start creating a new VPN during the main system's problem.
Want to add a new branch without changing every VPN
In a point-to-point connected system, adding a new branch may require changing values at the headquarters or multiple branches. But in Mesh, we create a new Node, announce the Network of that branch, and add the necessary Route through the central Dashboard.
What Cloudflare Mesh Does Not Fully Replace
- Mesh does not automatically make the internet faster. The maximum speed still depends on the internet upload and download speeds of each side, distance, route quality, and the performance of the Node device.
- Mesh does not replace the organization's internal firewall. We still need to define firewall rules on the server, router, and operating system.
- Mesh does not replace data backup. If the server fails or data is deleted, no matter how good the tunnel is, it cannot recover the data.
- Systems that require QoS, fine WAN control, or specialized SLA may still be more suitable for SD-WAN, MPLS, or other enterprise solutions.
- Not all devices should have access to all systems. Policies should be used to restrict access based on users, devices, IPs, and necessary ports.
Example system to be used in the article
| Location | Network Range | Mesh Node IP in LAN | Sample Device |
|---|---|---|---|
| Head Office Bangkok | 10.10.10.0/24 | 10.10.10.20 | File Server 10.10.10.50 |
| Chiang Mai Branch | 10.20.20.0/24 | 10.20.20.20 | Server 10.20.20.50 |
| Remote Employees | Receive Mesh IP from Cloudflare | No Node required on device | Windows or macOS Notebook |
The goal is for devices in the headquarters to access the branch server, devices in the branch to access the File Server at the headquarters, and employees' notebooks to access the authorized systems, without having to open ports from the internet to the internal servers.
Things to prepare before starting
Cloudflare Account
You must have a Cloudflare account and enable Cloudflare One or Zero Trust for the organization. The system will require you to set a Team Name, which is used when enrolling employee devices into the organization.
Linux machines for each branch
Mesh Node runs on Linux and can use a physical machine, a virtual machine, or a small server that stays on all the time. For experimentation, Ubuntu Server 24.04 is an easy-to-understand choice.
- Can connect the branch LAN
- Can access the Internet
- Set a static internal IP
- Keep it on whenever the branches need to connect
- Should not be installed on the Domain Controller or primary DNS Server
- Should not run other VPN Clients on the same machine during initial testing
Permission to Set Static Route
If you want all devices on the LAN to use Mesh without installing a client on each device, the router at each branch must be able to add a Static Route. A Static Route is a signpost that tells the router that if it wants to go to the network of another branch, it must send the data to which Mesh Node.
The IP range of each branch must not be duplicated
The headquarters and branches should not use the same network segment, such as both sides using 192.168.1.0/24, because the system will not know which side the destination is on. It is recommended to plan as follows: headquarters 10.10.10.0/24, first branch 10.20.20.0/24, second branch 10.30.30.0/24, and Cloud 10.40.40.0/24.
Check Mesh IP Range
Cloudflare uses the 100.96.0.0/12 range as the default Mesh IP. If an organization is already using this range, the Device IP Range must be adjusted before deploying the system in production.
Overview of Setup Steps
- Open the Cloudflare Dashboard and go to Networking > Mesh
- Use the Setup Wizard to prepare the account
- Create a Mesh Node for the headquarters
- Install the Cloudflare One Client on Ubuntu
- Announce the headquarters network route
- Create a Node at the branch office
- Announce the branch office network route
- Add Static Routes on both routers
- Adjust Split Tunnel so that the other branch's route goes through Cloudflare
- Test Ping and real services
- Install the Client on employees' notebooks
- Create Policies to restrict permissions
- Add backup Nodes if High Availability is needed
Step 1: Enable Cloudflare Mesh
- Log in to the Cloudflare Dashboard
- Select the Account you want to use
- Go to Networking
- Select Mesh
- Click Add a node
- Name the Node, for example, BKK-HQ-MESH01
- Click Create node
If this is the first time setting it up, Cloudflare will display the Setup Wizard to prepare Device Enrollment, Device Profile, Mesh IP, and Gateway Proxy for the new account. The Wizard will automatically create the basic values, but if the account is already using Zero Trust, the system will not overwrite existing values. Therefore, administrators should also check the existing Profile.
Step 2: Prepare Ubuntu Server
This example uses Ubuntu Server 24.04 and sets the IP of the headquarters machine to 10.10.10.20
Update System
sudo apt update
sudo apt upgrade -y
Check IP
ip address
Test Gateway
ping -c 4 10.10.10.1
Internet Test
ping -c 4 1.1.1.1
DNS Test
ping -c 4 cloudflare.com
If you can ping 1.1.1.1 but cannot ping cloudflare.com, it indicates a DNS problem. You should fix it before installing Mesh.
Mesh Nodes should always use the same IP because the router will point the static route to this IP. If the IP changes, the route between branches will stop working. You can reserve the IP through DHCP Reservation on the router or set a static IP on Ubuntu.
Step 3: Install Cloudflare One Client on Ubuntu
After creating a Node in the Dashboard, the system will display the installation command that already contains the Node's Token. It is recommended to copy it directly from the Dashboard.
Add the key and Repository
curl -fsSL https://pkg.cloudflareclient.com/pubkey.gpg | sudo gpg --yes --dearmor -o /usr/share/keyrings/cloudflare-warp-archive-keyring.gpg
echo "deb [signed-by=/usr/share/keyrings/cloudflare-warp-archive-keyring.gpg] https://pkg.cloudflareclient.com/ $(. /etc/os-release && echo $VERSION_CODENAME) main" | sudo tee /etc/apt/sources.list.d/cloudflare-client.list
Install the program
sudo apt-get update
sudo apt-get install -y cloudflare-warp
Enable IP Forwarding
printf 'net.ipv4.ip_forward = 1\nnet.ipv6.conf.all.forwarding = 1\nnet.ipv6.conf.all.accept_ra = 2\n' | sudo tee /etc/sysctl.d/99-zzz-cloudflare-warp-connector.conf
sudo sysctl --system
Register Node
sudo warp-cli connector new <NODE-TOKEN>
sudo warp-cli connect
Replace <NODE-TOKEN> with the actual Token. Do not post the Token in articles, public screenshots, or send it to unrelated persons.
Check Status
warp-cli status
Then go back to the Networking > Mesh page and check that the Node shows Online and has a Mesh IP
Step 4: Add the Headquarters Route
- Go to Networking > Mesh
- Select BKK-HQ-MESH01
- Open the Routes section
- Click Add route
- Enter the CIDR as 10.10.10.0/24
- Check that the Route points to the headquarters Node
- Save
This route tells Cloudflare that if you want to go to an IP in the 10.10.10.0/24 range, send the data to the Head Office Node. If the organization uses a subnet mask different from 255.255.255.0, the CIDR must match the actual system.
Step 5: Create a Node at the Chiang Mai Branch
- Create a Node named CNX-BRANCH-MESH01
- Install the Cloudflare One Client on Ubuntu with IP 10.20.20.20
- Enable IP Forwarding
- Register with the Branch Node Token
- Run warp-cli connect
- Check that the Node is online
- Add the route 10.20.20.0/24 to point to this Node
Step 6: Add a Static Route at the Head Office
| Destination | Next Hop | Meaning |
|---|---|---|
| 10.20.20.0/24 | 10.10.10.20 | Data to branch should be sent through the Mesh Node at headquarters |
| 100.96.0.0/12 | 10.10.10.20 | Data to Mesh IP should be sent through the Mesh Node |
The menu names of routers may vary by brand, such as Static Route, Routing Table, Advanced Routing, or Policy & Routing, but the main values are the same: Destination Network and Next Hop
Example Approach on TP-Link Omada
- Log in to Omada Controller and select a Site
- Go to Settings
- Enable Transmission or Routing depending on the version
- Select Static Route
- Create a Route to 10.20.20.0/24
- Set the Next Hop to 10.10.10.20
- Create a Route to 100.96.0.0/12
- Set the Next Hop to 10.10.10.20
- Save and check that the Route is Active
Step 7: Add a Static Route at the Chiang Mai Branch
| Destination | Next Hop | Meaning |
|---|---|---|
| 10.10.10.0/24 | 10.20.20.20 | Data to headquarters should be sent through the branch Mesh Node |
| 100.96.0.0/12 | 10.20.20.20 | Data to Mesh IP should be sent through the Mesh Node |
The route must include both the outbound and return paths. If only the headquarters is set to reach the branch, but the branch is not set to respond back, the information may reach the destination, but the response will go the wrong way, making it impossible to provide the service.
Step 8: Check Split Tunnel
Split Tunnel determines which traffic is routed through Cloudflare and which traffic goes through the regular network.
- Include Mode Pass through Cloudflare only for the specified range
- Exclude Mode Pass through Cloudflare for almost everything except the ranges specified not to pass through
For Mesh Node, using Include Mode is usually easy to understand because it only passes through Cloudflare the Mesh IP and the range of other branches.
Headquarters should Include
- 100.96.0.0/12
- 10.20.20.0/24
- 100.80.0.0/16 if using Hostname Routing
- 2606:4700:0cf1:4000::/64 if using Hostname Routing via IPv6
Branches should include
- 100.96.0.0/12
- 10.10.10.0/24
- 100.80.0.0/16 if using Hostname Routing
- 2606:4700:0cf1:4000::/64 if using Hostname Routing via IPv6
If the Profile uses Exclude Mode, check that 100.64.0.0/10 is not excluded, which could cause the Mesh IP to route through the normal Network.
Step 9: Test Site-to-Site
Testing Node-to-Node with Mesh IP
ping -c 4 <MESH-IP-of-branch-NODE>
Test Local IP of Branch Node
ping -c 4 10.20.20.20
Test Server After Node
ping -c 4 10.20.20.50
Test from a machine in the LAN
Windows
ping 10.20.20.50
tracert 10.20.20.50
macOS or Linux
ping 10.20.20.50
traceroute 10.20.20.50
You should test layer by layer. If the Mesh IP works but the Private IP does not, check the CIDR Route, Split Tunnel, IP Forwarding, return Static Route, and the destination Firewall.
Real Port Test
- SSH Port 22
- Remote Desktop Port 3389
- SMB Port 445
- HTTPS Port 443
- Database according to the system, such as 1433, 3306, or 5432
Windows PowerShell
Test-NetConnection 10.20.20.50 -Port 443
macOS or Linux
nc -zv 10.20.20.50 443
Ping not responding does not always mean the service is down, because some servers block ICMP while the ports in actual use are still reachable.
Step 10: Connect the Employee's Notebook
Windows and macOS
- Download and install the Cloudflare One Client
- Open the program
- Select Zero Trust Security
- Enter your organization's Team Name
- Log in according to the method specified by the administrator
- Confirm the registration
- Check that the Client shows Connected
iOS and Android
- Install Cloudflare One Agent
- Open the app and accept the policy
- Enter Team Name
- Log in
- Allow installation of VPN Profile
- Turn on Connected status
The Device Profile of the Notebook must send 100.96.0.0/12, and the internal networks that users need to access through Cloudflare should not include every network unnecessarily.
Set a policy for employees to access only necessary systems
| User Group | Destination | Port | Sample Permission |
|---|---|---|---|
| Accounting Department | 10.10.10.60 | 443 and Accounting Program Port | Accounting system only |
| General Employees | 10.10.10.50 | 445 | File Server |
| IT Department | Designated Server Range | 22, 443, 3389 | System maintenance as duty |
| Vendor | Single Server | Specified Port | Temporary permission |
The principle to follow is to grant permission only as necessary. If an employee only needs to use a single File Server, the entire network and all ports should not be opened.
Accessing Synology NAS via Mesh
The NAS does not need to have the Cloudflare One Client installed directly. If it is behind a Mesh Node and the LAN CIDR route is announced, a notebook or another branch can access the NAS via its private IP.
- DSM: https://10.10.10.50:5001
- Windows SMB: \\10.10.10.50\Folder Name
- macOS SMB: smb://10.10.10.50/Folder Name
Only the necessary ports should be allowed, and the NAS firewall should not be completely turned off to solve the problem.
Connecting Cloud Server with Office
The principle is the same as adding a branch, just install a Linux VM as a Mesh Node in the VPC or Virtual Network of the Cloud Provider.
- Create a Linux VM in the Cloud Network
- Install the Cloudflare One Client and register as a Node
- Add the Cloud Network route in Cloudflare
- Adjust the Split Tunnel to recognize the office network
- Add a route table in the Cloud Provider to ensure responses go through the Mesh Node
- Enable IP Forwarding or disable Source/Destination Check according to the Provider's requirements
- Set up a Security Group for only the necessary ports
Using Private Hostname Instead of IP
Cloudflare supports Hostname Route to allow calling names such as fileserver.internal.example.com or erp.internal.example.com instead of remembering IP addresses, suitable for applications where the IP may change or users should not have to remember the IP.
Before use, check that the Mesh Node is using a supported Client version, enable the Gateway Proxy, and include 100.80.0.0/16 in the Device Profile, as well as the IPv6 specified by Cloudflare.
Implementing High Availability
If there is only one node, when that machine fails or is being updated, the branch system will not be able to connect through Mesh. Cloudflare Mesh supports Active–Passive replica, with one machine operating and the other waiting as a backup.
- Prepare a second Linux machine on the same network
- Set a static IP, for example 10.10.10.21
- Go to Networking > Mesh
- Select the existing Node
- Click Add a replica
- Copy the command and Token
- Install the Client on the backup machine
- Check that one machine is Active and the other machine is Passive
Be aware that static routes on a router often point the next hop to the local IP of a node. If the active node changes from 10.10.10.20 to 10.10.10.21 but the router still points to the old machine, failover on the Cloudflare side alone may not be enough. Therefore, it is advisable to plan for a virtual IP, VRRP, multiple next hops, or additional health checks on the router.
Using Two Internet Connections
Type 1: Single Node, Let the Router Perform WAN Failover
The router checks the WAN. If WAN1 fails, it switches the default route to WAN2, while the Mesh Node still uses the same local IP. This method is easy to manage and suitable for general organizations.
Type 2: Two Replicas, Separate WAN
Install two replica machines, then use Policy Routing on the firewall to force the first machine to go out through WAN1 and the second machine to go out through WAN2. This method helps separate the damage to both the Node and WAN, but you need to plan the LAN-side Next Hop to switch according to the Active Replica.
It is recommended to test shutting down WAN1, shutting down WAN2, shutting down the Active Node, and restarting the Router while recording the time when the system becomes operational again.
Firewalls to Check
Ubuntu Mesh Node
sudo ufw status verbose
The firewall should not be permanently turned off. Only the traffic that needs to be forwarded should be allowed.
Windows
Windows may block incoming traffic from 100.96.0.0/12. You need to create an inbound rule for the required protocol and port, such as RDP TCP 3389, by restricting the source IP.
NAS
Add the Source IP of the branch network or Mesh IP along with the Port, such as 445, 5001, or the Port of the Backup Application
Firewall between VLANs
If a Node is in the Server VLAN but the destination is in another VLAN, an Inter-VLAN Rule must be allowed; a Static Route alone cannot bypass the Firewall Rule.
Common Problems
Node Offline
- Check the internet and DNS
- Run warp-cli status
- Check the computer's time
- Check the outbound Firewall
- Check the Token
Can ping Mesh IP but cannot access Private IP
- Check CIDR Route
- Check Split Tunnel
- Check IP Forwarding
- Check Return Static Route
- Check Destination Firewall
Nodes can communicate, but LAN cannot
- Check the Static Route on the Router
- Use traceroute
- Check the Forwarding Rule
- Check the return Route at the destination
Notebook is registered but cannot access Mesh
- Check Client Connected
- Check 100.96.0.0/12 in Split Tunnel
- Check Gateway Policy
- Check Windows Firewall
There are several VPN clients
Tailscale, WireGuard, OpenVPN, AnyConnect, GlobalProtect, or other programs may compete to control the Routing Table. For testing, you should turn off other VPNs, restart the computer, and then check again.
Installed on the DNS Server and DNS has a problem
Cloudflare recommends not running a Mesh Node on Active Directory DNS, Pi-hole, Unbound, BIND, or dnsmasq. You should create a separate Linux VM in the same Subnet.
Using Tunnel and Mesh on the same device and the Tunnel disconnects
They can run together, but you need to set up a Split Tunnel to exclude the Hostname and IP that cloudflared uses. For a typical organization, separating into different VMs is easier to manage.
Safety Guidelines
- Use a dedicated Node for this task
- Regularly update Ubuntu and the Cloudflare One Client
- Keep the Node Token secret
- Enable MFA for administrators
- Assign administrator permissions according to roles
- Check Gateway Logs
- Open only necessary Ports
- Create a Network Diagram and a list of Routes
Rollback Plan for the Initial Installation
- Backup Router and Firewall Config before adding Route
- Record the added Static Route entries
- Test on IT machines only first
- If there is a problem, disable the new Route
- Run sudo warp-cli disconnect on the Node
- Restore Split Tunnel
- Check that the original route is working again
- Save Logs and traceroute for analysis before the next test round
Practical Implementation Guidelines
Phase 1: Proof of Concept
- Create nodes at two locations
- Announce only to the test network
- Allow only the IT department
- Test Ping, SSH, HTTPS, and File Transfer
- Measure Latency and speed
Phase 2: Pilot
- Add small group users
- Create Policy by department
- Test Windows, macOS, and phones
- Test WAN Failover
- Test Restart Node and Router
Phase 3: Production
- Add replicas for important branches
- Enable monitoring and alerts
- Set patch cycles
- Move applications one system at a time
- Keep the original VPN as a backup initially
- Review policies after use
Advantages
- No need for a public IP at every branch
- No need to open ports from the Internet to the node
- Add nodes and routes from the central dashboard
- Supports employee computers and phones
- Supports TCP, UDP, and ICMP
- Uses Zero Trust Policy to limit permissions
- Supports Active–Passive HA
- Can start testing without changing the existing system
Limitations
- Mesh Node requires Linux
- Still need to understand Routes and basic Static Routes
- Overlapping IP ranges between branches will cause problems
- The destination firewall still needs to allow Traffic
- Multiple VPN Clients may conflict
- HA on the LAN side may require additional Router capabilities
- Actual performance depends on the Internet and Node machines
- Menus and features may change with updates
Number of Nodes and Deployment Plan
Cloudflare stated that Mesh supports up to 50 Mesh Nodes per account according to the current account limit, and announced that it can be started for free with up to 50 Nodes and 50 Users under the conditions of Cloudflare One.
Before using it for business purposes, you should check the Pricing and Account Limits again, because the number of users, log storage, support, and some Zero Trust features may vary according to the plan.
Frequently Asked Questions
Does each branch need to have a Public IP?
Not necessary in many cases because the Node is the one connecting out to Cloudflare.
Do I need to open Port Forwarding?
No need to open Port Forwarding from the internet to the Node for normal Mesh connections.
Can it be used instead of IPSec VPN?
It can replace in many use cases, but you should test the actual application, measure performance, check policies, and have a rollback plan before canceling the old VPN.
Can Node be installed on Windows Server?
Windows can join as a Client, but the Node that declares the Network ring uses Linux according to the current documentation.
Can it be used with Synology NAS?
Yes, by placing the NAS behind the Mesh Node and announcing the NAS network's CIDR route.
Can it be used with Active Directory?
It is possible to access the Domain Controller through the Route, but a Mesh Node should not be installed directly on the Domain Controller or DNS Server.
Is it possible to allow all branches to talk to each other?
It is possible, but permissions should be divided according to roles. Not all ports and networks should be opened without a policy.
Is Cloudflare Mesh always faster than a direct connection?
No guarantee on all routes. Actual speed depends on ISP, latency, packet loss, node device, and application, so testing from the actual location is required.
Should choose Tunnel or Mesh
If you want to open a Web Application via a domain name, using a Tunnel is more suitable. If you want a Server, Notebook, and multiple Networks to communicate using Private IP and common Protocols, using a Mesh is more suitable. Many organizations use it together.
Checklist Before Actual Use
- Each branch has a unique IP range
- Mesh Node uses a fixed IP
- All Nodes are Online
- All CIDR Routes are added
- Split Tunnels for all networks
- Router has Static Routes for both directions
- Enable IP Forwarding on Linux
- Firewall opens only necessary Ports
- Test from Node, LAN, and Remote Client
- Test WAN and Node Failover
- Have Backup Config and Rollback Plan
- Enable MFA
- Store Node Tokens securely
- Record Network Diagram and responsible persons
Summary
Cloudflare Mesh is a new option for organizations that want to connect headquarters, branches, cloud servers, and employee devices together without opening internal systems to direct internet connections and without the need for a public IP at every location.
The startup is divided into clear steps, including creating a Mesh Node, declaring a Route, setting a Static Route on the Router, adjusting the Split Tunnel, and enabling the Firewall only for the necessary parts.
The key point is not just to make the Ping reach, but to assign permissions appropriately, check the return route, separate the Node from the DNS Server, and prepare a backup system for important branches.
The organization should start with a small-scale Proof of Concept without dismantling the existing VPN. Once it is verified that the real application works, has appropriate speed, the policies are correct, and the team can manage it, then it can be expanded to other branches.
References
- https://developers.cloudflare.com/cloudflare-one/networks/connectors/cloudflare-mesh/
- https://developers.cloudflare.com/cloudflare-one/networks/connectors/cloudflare-mesh/get-started/
- https://developers.cloudflare.com/cloudflare-one/networks/connectors/cloudflare-mesh/routes/
- https://developers.cloudflare.com/cloudflare-one/networks/connectors/cloudflare-mesh/client-devices/
- https://developers.cloudflare.com/cloudflare-one/networks/connectors/cloudflare-mesh/high-availability/
- https://developers.cloudflare.com/cloudflare-one/networks/connectors/cloudflare-mesh/tips/
- https://developers.cloudflare.com/cloudflare-one/account-limits/
- https://blog.cloudflare.com/mesh/
Note: Information checked as of July 26, 2026. Menu names, installation steps, limitations, and capabilities may change in the future. The latest documentation should be checked before installing in the Production system.
Need expert advice or would like to request a quotation? Contact us today:
E-mail: [email protected]
LINE Official: @sync.co.th

The Company reserves the right to correct any typographical or printing errors and shall not be held liable for any inaccuracies resulting from such errors.
*** This article is the intellectual property of SyncTech Solution Company Limited. Reproduction, modification, or redistribution of this content, in whole or in part, is strictly prohibited without prior written permission from the Company. ***